Ultimate Guide to Using a SIM Cards iPhone
Introduction
📱 In today’s hyper-connected world, our smartphones are more than just devices; they’re lifelines to our personal and professional lives. Whether it’s staying in touch with loved ones, navigating through GPS, or catching up on the latest news, our phones keep us connected to the world around us. And at the heart of this connectivity is the small yet mighty SIM card. 🌍
If you’re an iPhone user, understanding how to use a SIM card can significantly enhance your mobile experience. SIM cards have evolved tremendously over the years, adapting to the ever-changing landscape of technology. From the traditional Mini-SIMs to the latest eSIM technology, these tiny chips have become integral to our mobile experience. 📶
But what exactly is a SIM card? How do you insert it into your iPhone, and what should you do if you encounter issues? This comprehensive guide will answer all these questions and more. We’ll delve into the different types of SIM cards, explore the compatibility across various iPhone models, and even walk you through the process of setting up and managing Dual SIM and eSIM functionalities. Whether you’re a seasoned tech enthusiast or a newcomer to the iPhone world, this guide has got you covered. 🛠️
Moreover, with the advent of Dual SIM technology, iPhone users now have the flexibility to use two phone numbers simultaneously, making it easier to separate work and personal calls. And for those who travel frequently, understanding how to manage international SIM cards and avoid hefty roaming charges is crucial. 🌐✈️
So, grab your iPhone, sit back, and let’s embark on this journey to master the art of using SIM cards in your iPhone. By the end of this guide, you’ll be equipped with all the knowledge you need to make the most out of your device’s capabilities. Let’s dive in! 🚀
Compatibility
Which iPhones Use Which SIM Cards? 📱🔄
Different iPhone models require different types of SIM cards. Understanding which SIM card your iPhone uses can save you a lot of hassle when setting up your device or upgrading to a new one. Here’s a quick rundown to help you out:
- iPhone 3G/3GS: These older models use the larger Mini-SIM cards. 📏
- iPhone 4/4S: Apple introduced the Micro-SIM with these models, which are smaller than the Mini-SIM. 📐
- iPhone 5 and newer: Starting with the iPhone 5, Apple moved to the Nano-SIM, which is even smaller and continues to be the standard for physical SIM cards in iPhones today. 📉
- iPhone XS, XS Max, XR, and newer: These models offer the best of both worlds, supporting both the Nano-SIM and the more advanced eSIM. The eSIM is a digital SIM that allows you to activate a cellular plan from your carrier without having to use a physical Nano-SIM. 📲✨
Checking Your iPhone’s SIM Card Compatibility 🔍📖
If you’re unsure about what type of SIM card your iPhone uses, there are a couple of easy ways to check:
- Apple’s Official Website: Head over to Apple’s official website and look up the specifications for your iPhone model. Apple provides detailed information on each model, including the type of SIM card it uses. 🌐💡
- User Manual: If you still have the user manual that came with your iPhone, it will include information about the type of SIM card required. 📚✅
- Settings on Your iPhone: You can also check within your iPhone’s settings. Go to Settings > General > About and look for information about your device, which might include the SIM card type. ⚙️🔧
- Carrier Support Pages: Your carrier’s website can also be a useful resource. Many carriers provide detailed guides and support pages that can help you determine the correct SIM card type for your specific iPhone model. 🌍📞
Knowing which SIM card your iPhone uses is crucial, especially if you’re planning to switch carriers, travel internationally, or upgrade to a new model. It ensures that you can seamlessly transition without any interruptions in your connectivity. 📶💪
Understanding these details will help you make the most of your iPhone’s capabilities, whether you’re a tech newbie or a seasoned pro. So, before you make any changes or upgrades, make sure you know exactly which SIM card your iPhone needs! 😊📲
How to Insert a SIM Cards in Your iPhone 📲✨
Inserting a SIM card into your iPhone is straightforward and quick. Here’s a simple guide to get you started:
- Turn Off Your iPhone 🔌 Before you start, make sure to turn off your iPhone. This is just a safety measure to avoid any glitches while you handle the SIM card.
- Locate the SIM Tray 🔍 The SIM tray is usually on the side of your iPhone. If you’re not sure exactly where, a quick look in your iPhone’s user manual or a fast search on Apple’s website should point you in the right direction.
- Open the SIM Tray 🛠️ Use the SIM eject tool that came with your iPhone or a small paperclip if the tool isn’t handy. Insert it into the small hole next to the SIM tray and press gently. The tray should pop out easily.
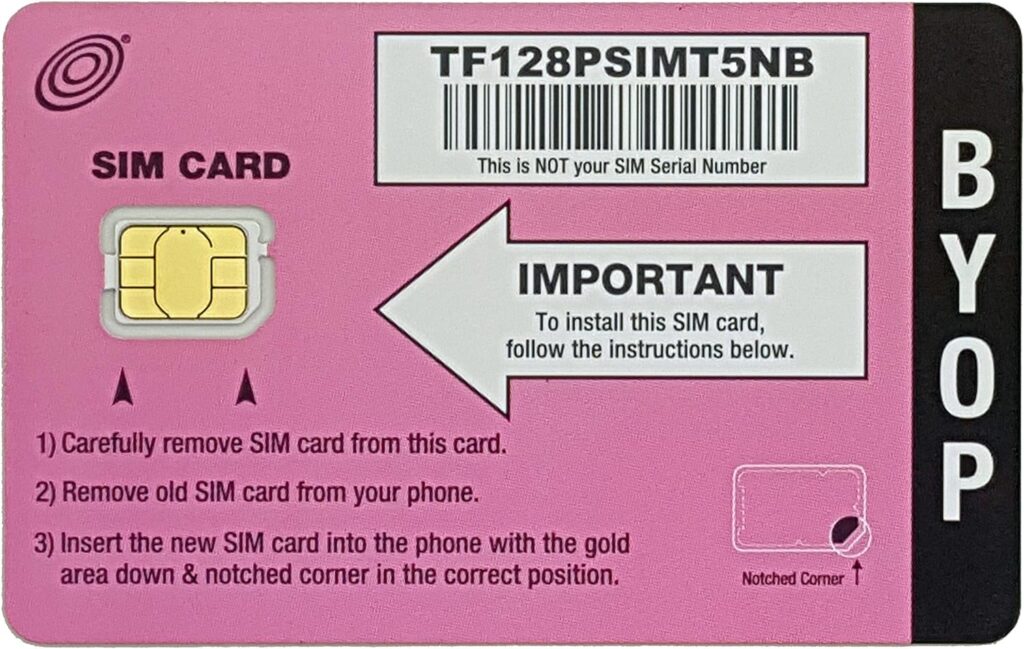
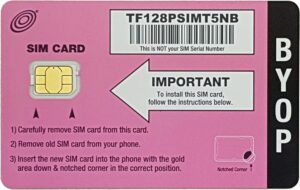
- Place the SIM Card 📐 Now, take your SIM card and place it into the tray. The gold contact side should be facing down, and make sure the cut corner aligns with the tray’s shape. This ensures a perfect fit.
- Reinsert the Tray 🔄 Carefully slide the tray back into the phone until it clicks into place. Make sure not to force it to avoid any damage.
Troubleshooting Common Issues 🚨
Here are a few tips if things don’t go smoothly:
- SIM Not Recognized: Check if the SIM is properly seated in the tray and that the tray is securely closed. Sometimes, reinserting the SIM card does the trick.
- No Service: After inserting the SIM card, if your iPhone shows “No Service,” ensure that the SIM is active. You may need to get in touch with your carrier to activate it. Also, restarting your iPhone can help it recognize the new SIM.
That’s all there is to it! With these simple steps, your iPhone will be ready to keep you connected wherever you go. Enjoy your time on the network! 😊📞
Activating a SIM Cards on Your iPhone 📱✨
Activating a SIM card in your iPhone is an exciting step—it means you’re just moments away from connectivity! Here’s how to make sure your iPhone and new SIM card are all set to go:
- Insert the SIM Card 📲 Start by inserting your SIM card into your iPhone. If you need a quick refresher on how to insert the SIM, check the instructions above or flip through your iPhone’s user guide.
- Turn on Your iPhone 🔑 Once the SIM is securely in place, power on your iPhone. Just press and hold the side button until the Apple logo appears.
- Follow the On-Screen Instructions 👆 Your iPhone will guide you through the setup process. This will include selecting your language, connecting to Wi-Fi, and a few other settings. When it comes to activating the SIM, just follow the prompts on your screen. It’s super easy and mostly automatic!
Carrier-Specific Instructions 📞
Each carrier has its own set of nuances when it comes to activating a new SIM:
- Carrier-Specific Steps: Depending on your carrier, you might need to enter additional information during the activation process. This could be anything from a verification code sent via SMS to your old device, to logging into your carrier account.
- Activation Help: If your iPhone doesn’t automatically prompt you for these steps, no worries! Just visit your carrier’s website or give their customer service a call. They often have detailed guides or helpful agents to walk you through the process.
- Troubleshooting Tips: Occasionally, things don’t go as planned. If you encounter issues like “No Service” or “SIM Not Valid,” double-check that the SIM card is inserted correctly. Restarting your iPhone can also help. If that doesn’t work, reaching out to your carrier is the best next step. They can check if there’s an issue with the SIM card or your account settings.
Activating your SIM is usually a breeze, and before you know it, you’ll be ready to make calls, send texts, and enjoy data services. Welcome to your connected life! 🌐😊
Dual SIM Functionality on Your iPhone 📲📞
If you’ve ever wished you could have two phone numbers on a single iPhone, the Dual SIM feature is just what you need! Let’s dive into what Dual SIM is, its benefits, and how to set it up on your iPhone.
What is Dual SIM?
Dual SIM technology allows you to use two different SIM cards in one iPhone. This means you can have two phone numbers and two separate data plans on the same device. Modern iPhones achieve this with one physical SIM slot and an eSIM, which is a digital SIM that you activate through your carrier.
Benefits of Using Dual SIM
- Separate Work and Personal Numbers: Having two numbers on one phone lets you keep your professional and personal lives distinct. You can manage calls, texts, and notifications from two different lines without carrying two devices.
- Different Data Plans: With Dual SIM, you can switch between different data plans. This is especially handy when traveling. Use a local SIM to save on roaming fees and keep your regular number active for urgent calls back home.
How to Set Up Dual SIM on Your iPhone
Setting up Dual SIM on your iPhone is straightforward. Here’s how to get started:
- Insert the Physical SIM Card: If you haven’t already, insert your physical SIM card into the iPhone’s SIM tray.
- Activate the eSIM: Follow your carrier’s instructions to activate the eSIM. This often involves scanning a QR code provided by your carrier or entering information manually into your phone settings.
- Configure Dual SIM Settings:
- Open Settings on your iPhone.
- Tap on Cellular or Mobile Data depending on your region.
- You’ll see options for setting up your Primary and Secondary lines. Here, you can choose which number to use by default for making calls, sending texts, and using data.
- Customize Usage: Decide how you want to use each number. For instance, you might choose to use one line for calls and texts and the other for data. Or use one line primarily and keep the other as a backup.
- Manage Your Communication Preferences: In the same menu, you can decide which line you want apps to use. For example, you can assign one number for WhatsApp and the other for business calls through another app.
With Dual SIM enabled, managing two numbers becomes incredibly efficient. You can easily switch between lines depending on your needs, ensuring you’re always connected in the most convenient way possible.
Enjoy the flexibility and convenience that Dual SIM brings to your iPhone experience! 🌐🎉
Managing SIM Cards on Your iPhone 📲🔄
Managing your SIM cards effectively on an iPhone, especially when using the Dual SIM feature, is essential for maximizing your device’s capabilities. Here’s a detailed guide on how to switch between SIMs, set up primary and secondary numbers, and manage your data usage effectively.
Switching Between SIM Cards
If you have Dual SIM functionality, your iPhone allows you to switch between SIMs with ease, providing flexibility depending on your needs. Here’s how to do it:
- Access Settings: Open the Settings app on your iPhone.
- Navigate to Cellular: Tap on Cellular or Mobile Data if you’re outside the United States.
- Select Your Preferred Line: Here, you can select your preferred line for making calls, sending messages, and using cellular data. Just tap on the line and choose your default.
This feature is particularly useful when you want to manage personal and work calls separately or when traveling internationally.
Setting Up Primary and Secondary Numbers
Your iPhone allows you to define which of your two numbers should be considered primary and which should be secondary. This is crucial for managing your calls and data effectively:
- Go to Settings > Cellular: This menu will show your two lines, labeled as “Primary” and “Secondary.”
- Assign Roles: Decide which number you want to use primarily for outgoing calls, texts, and data. Typically, your primary number might be the one associated with personal use, or the one that has better coverage or data rates.
- Customize Usage: You can customize which number to use by default for each function—whether making calls, sending texts, or browsing the internet.
Data Usage Management
Keeping an eye on your data usage is crucial, especially if you are on limited data plans or traveling:
- Monitor Your Data: Head over to Settings > Cellular. Here, you’ll see an overview of your data consumption for each SIM card.
- Set Data Limits: Some carriers allow you to set data limits and warnings to prevent overages. Check if your carrier supports this in the cellular data settings.
- Manage App Data Usage: You can also control which apps are allowed to use cellular data. This can be done by scrolling down in the Cellular settings menu and toggling data usage on or off for specific apps.
Managing your data usage and SIM settings effectively helps avoid unexpected charges and ensures that you are always using the most appropriate line and data plan according to your current needs.
By mastering these settings, you can make the most out of your iPhone’s Dual SIM capability, keeping both your data and your wallet in check! 📊📱💬
International Travel and SIM Cards for Your iPhone 🌍✈️
Taking your iPhone abroad? Here’s how to stay connected without breaking the bank on roaming charges. With a little preparation, you can make the most out of your iPhone’s capabilities while traveling internationally.
Using Your iPhone Abroad
Before you jet off, it’s essential to ensure your iPhone is ready for the trip:
- Check If Your iPhone Is Unlocked: An unlocked iPhone can use any SIM card from any carrier, which is crucial when traveling. You can check this by contacting your carrier or looking in your iPhone’s settings under Settings > General > About > Carrier Lock.
- Verify Network Compatibility: Make sure your iPhone supports the network bands used in your destination country. Most newer iPhones have broad international support, but it’s still worth a quick check.
Choosing the Right International SIM Card
Selecting the right SIM card is critical for managing costs and staying connected:
- Local SIMs: Upon arrival, consider buying a local SIM card. These often offer the best rates for calls and data. Local retailers, kiosks at the airport, or even some convenience stores usually have these available at competitive prices.
- International SIMs: These SIM cards provide coverage in multiple countries and are convenient but can be more expensive than local options. They’re a good choice if you’re visiting several countries and want the ease of one SIM card.
Tips for Avoiding Roaming Charges
Here are some practical tips to avoid unexpected costs:
- Turn Off Data Roaming: Navigate to Settings > Cellular > Data Roaming and toggle it off. This prevents your iPhone from using cellular data abroad unless you decide to turn it on.
- Use Wi-Fi Whenever Possible: Take advantage of Wi-Fi at hotels, cafes, and airports to stay connected. Many places offer free Wi-Fi, so you can save your data for when you really need it.
- Consider Wi-Fi Calling: If your carrier supports it, Wi-Fi calling is a great way to make calls without incurring roaming charges.
Traveling with your iPhone doesn’t have to come with hefty fees. By preparing your device and choosing the right SIM, you can explore the world and stay connected without worry. Safe travels and enjoy capturing those beautiful moments on your iPhone! 📸🌐
Troubleshooting SIM Card Issues on Your iPhone 🛠️📱
Experiencing trouble with your SIM card can be frustrating, especially when you need your phone the most. Here are some common SIM card issues you might encounter with your iPhone, along with easy fixes to get you back on track!
Common Problems and Fixes
- No Signal: If your iPhone is showing no service or signal, the first step is to restart your phone. This can often re-establish network connections and clear up any minor glitches. If that doesn’t work, check if there are any carrier updates available by going to Settings > General > About. If an update pops up, make sure to install it.
- SIM Card Not Detected: Make sure the SIM tray is fully inserted and that the SIM card is properly seated. Sometimes removing the SIM card and carefully placing it back in the tray solves the problem. Ensure that the SIM tray is closed securely.
When to Contact Your Carrier
- Persistent Issues: If you’ve tried the above steps and still face problems, it might be time to call in the pros. Contact your carrier for further assistance. They have the tools to diagnose deeper issues and can determine if your SIM card is defective or if there are network-related problems affecting your service.
- Account-Related Problems: Sometimes, the issue might be related to your account (like a service suspension for overdue bills or an activation hold). Your carrier can check this for you and help resolve any account-related issues.
Remember, keeping your software up to date and ensuring your account is in good standing can prevent many common SIM issues. And if you’re ever in doubt, reaching out to your carrier’s customer service is a great next step—they’re there to help!
Happy troubleshooting, and here’s to getting your iPhone back to its best connectivity! 📞💪
Exploring eSIM Technology on Your iPhone 📱✨
The eSIM (embedded SIM) technology is revolutionizing how we connect our devices. Let’s dive into what an eSIM is, its advantages and disadvantages, and how you can set one up on your iPhone.
What is eSIM?
An eSIM is exactly what it sounds like—an electronic, or embedded, SIM. Unlike traditional SIM cards that require physical swapping, an eSIM is built right into your phone. You can store multiple carrier profiles on it and switch between them digitally, without needing to physically remove and insert anything.
Advantages of eSIM
- Convenience: The ability to switch carriers without having to physically swap out SIM cards makes everything a lot smoother, especially if you travel frequently or want to take advantage of different carriers’ plans.
- Space-Saving: Since the eSIM is embedded, it doesn’t require the space a traditional SIM card would. This extra space can lead to slimmer phone designs or more room for other hardware enhancements.
Disadvantages of eSIM
- Carrier Support: One of the biggest drawbacks is that not all carriers currently support eSIM technology, which can limit your options, especially in certain regions.
- Setup Complexity: Setting up an eSIM can sometimes be more complex than simply inserting a physical SIM card. You often need to go through a few more digital steps to get connected.
How to Set Up and Use eSIM on Your iPhone
Ready to get started with an eSIM? Here’s how you can set it up on your iPhone:
- Open Settings: Tap on Settings on your iPhone.
- Go to Cellular: Select Cellular, then tap on Add Cellular Plan.
- Scan Your QR Code: Use your iPhone to scan the QR code provided by your carrier. This QR code contains all the information your iPhone needs to start using the eSIM.
- Follow On-Screen Instructions: After scanning, follow the prompts on your iPhone to complete the setup. This might include choosing a cellular plan and customizing how your phone uses the eSIM for calls, texts, and data.
That’s it! Once you’ve completed these steps, your iPhone will be ready to use with your new eSIM. You can manage your plans directly from the settings whenever you need to switch or adjust your service.
eSIM technology is making it easier to stay connected, no matter where you are or which carrier you prefer. Give it a try and enjoy the new level of flexibility and convenience it brings to your mobile experience! 🌍📲
Security Concerns: Keeping Your iPhone SIM Card Secure 🛡️
Keeping your iPhone and SIM card secure is crucial, especially in a world where our phones carry so much personal information. Here are some tips to help you protect your SIM card and what to do if it gets lost or stolen.
Keeping Your SIM Secure
- Set a PIN: Protect your SIM card by setting a PIN (Personal Identification Number). This will prevent anyone from using your SIM to make calls or use data if your phone is lost or stolen. You can set this up in your iPhone’s settings under Settings > Cellular > SIM PIN.
- Lock Your Phone: Use a passcode or biometric security (like Face ID or Touch ID) to lock your iPhone. This adds an extra layer of security, ensuring that only you can access your device.
If Your SIM Card is Lost or Stolen
- Contact Your Carrier Immediately: If your SIM card is lost or stolen, notify your carrier as soon as possible. They can deactivate the lost SIM and prevent any unauthorized use. They’ll also issue you a new SIM card.
- Monitor Your Accounts: Keep an eye on any accounts linked to your phone number. If you notice any suspicious activity, report it immediately. This can include strange charges or notifications for accounts you didn’t sign up for.
Choosing the Right Data Plan for Your iPhone
Selecting the right data plan is vital to make the most out of your iPhone without overspending. Here’s how to choose:
- Consider Your Usage: Reflect on how much data you usually use and what you use it for. Do you stream a lot of videos, or are you mostly browsing websites? This will help you determine how much data you actually need.
- Compare Plans: Look for plans that offer enough data but also have good coverage and competitive prices. Don’t pay extra for data you won’t use, but ensure you have enough to cover your needs.
Comparing Prepaid vs. Postpaid Plans
Prepaid Plans
- Pros:
- No Contracts: You’re not tied down by a long-term contract.
- Control Over Spending: You pay for your services upfront, which helps avoid surprise bills.
- Cons:
- Limited Data and Services: Prepaid plans often come with fewer options and lower data limits compared to postpaid plans.
Postpaid Plans
- Pros:
- Better Deals on Devices: Carriers often offer discounts on the latest phones when you sign a contract.
- More Services: Access to family plans, unlimited data options, and international perks.
- Cons:
- Monthly Bills: You pay for your usage at the end of the billing cycle, which can lead to unexpected overage charges if you’re not careful.
Choosing the right plan can make a big difference in your mobile experience and your wallet. Consider what fits best with your lifestyle and budget to make an informed decision. 📱💼
The Future of SIM Cards in iPhones: Trends and Developments 🌐🚀
As we look ahead, the evolution of SIM technology is set to transform how we connect with our iPhones. Let’s explore what’s on the horizon for SIM cards and how these changes might enhance your mobile experience.
Trends and Future Developments
- Rise of eSIM: The adoption of eSIM technology is gaining momentum across the mobile industry. This means that more devices will come equipped with eSIMs, allowing for easier carrier switching and potentially lower costs for users.
- Better Integration: Expect to see SIM technology becoming more integrated with other smart devices and the Internet of Things (IoT). This could mean that your iPhone will seamlessly connect not just with cellular networks but also with a wider array of devices and services around your home or in the city.
How Upcoming Technology Might Change SIM Cards in iPhones
The future points towards fully digital SIM solutions. Here’s what that could mean for iPhone users:
- Fully Digital SIMs: Physical SIM cards might soon be a thing of the past. As eSIM technology becomes standard, the need for a physical card could disappear altogether, making devices thinner and leaving more room for other innovative features.
- Enhanced Connectivity: With digital SIMs, your iPhone could connect to multiple networks simultaneously. This would not only improve coverage and connectivity but also make your device smarter about how it uses available networks.
- Greater Convenience: Managing your mobile service could become as easy as downloading an app or scanning a code. Imagine switching carriers or adjusting your plan instantly, without the need to visit a store or handle tiny physical cards.
Conclusion
Understanding how to use a SIM card in your iPhone, whether it’s a traditional SIM, a Dual SIM setup, or an eSIM, can significantly enhance your mobile experience. This guide has covered the essentials to get you started and prepared you for the exciting changes ahead. As technology advances, staying informed and adapting to new capabilities will help you stay connected more effortlessly and make the most out of your iPhone’s ever-growing potential. Here’s to a future where connectivity is more integrated, flexible, and user-friendly! 📱💡
FAQs About Using SIM Cards in Your iPhone 📱💡
Navigating the world of SIM cards can be tricky, but I’m here to help clear up some common questions you might have about using SIM cards in your iPhone!
1. Can I use my iPhone without a SIM card?
Absolutely! You can certainly use your iPhone on Wi-Fi without a SIM card. While you won’t have access to cellular services like making calls or sending texts through your carrier, you can still connect to the internet, use apps, and make calls or send messages through various online platforms.
2. How do I know if my iPhone is unlocked?
To find out if your iPhone is unlocked, you can contact your carrier directly, or you can check it yourself. Just go to Settings > General > About and look for any information about a carrier lock. If you don’t see any mention of a lock, your iPhone is likely unlocked.
3. Can I use two different carriers with Dual SIM?
Yes, you can! Dual SIM iPhones are designed to let you use two different carriers at the same time. One line uses a physical SIM, and the other uses an eSIM. This setup is perfect for separating personal and work calls or for using a local data plan when traveling.
4. What happens if I remove the SIM card from my iPhone?
If you remove the SIM card, your iPhone will lose cellular service, but don’t worry—you can still use Wi-Fi. This means you can continue to access the internet, use most of your apps, and even make calls or send messages through apps like WhatsApp or FaceTime.
5. How do I transfer my contacts to a new SIM card?
On iPhones, your contacts are usually not stored on the SIM card; they’re synced with iCloud. To transfer your contacts to a new device, just make sure your iCloud account is set up and that contacts syncing is enabled. When you log into iCloud on your new device, your contacts will appear there automatically. No need to transfer anything manually!


